No gel nails, no cool girls! Everyday is new and fresh, and there is no way to highlight the fashion taste and concave shape through overlapping, and gel nails become an indispensable fashion item.
Gel nails have been popular all over the world for nearly 20 years. The gel nail is colorful and has various patterns. It can be easily matched with a variety of clothes and occasions, which becomes a must for all girls!

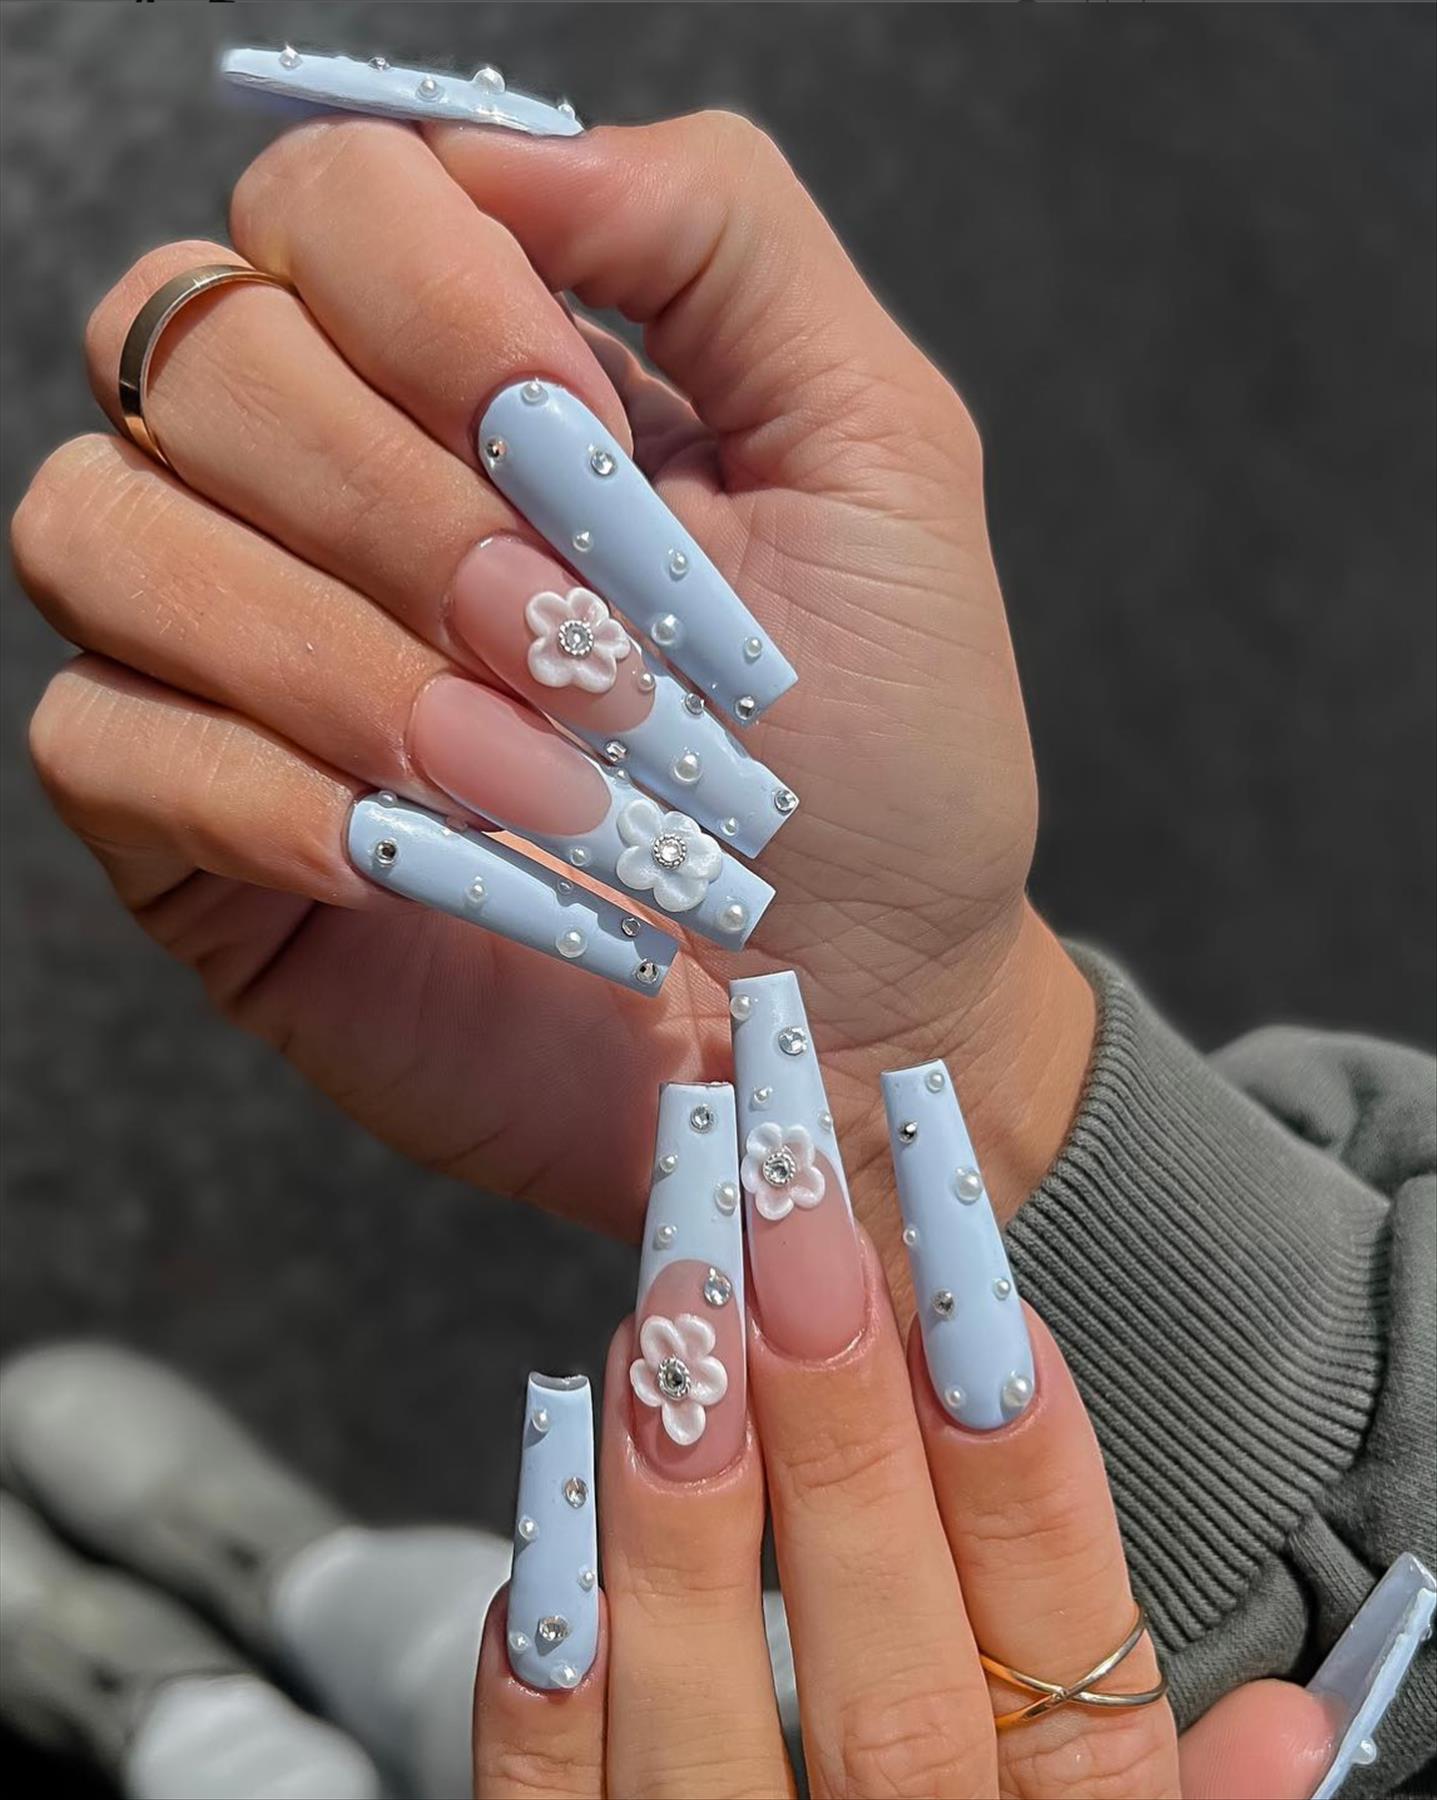
Light Pink Gel Nails
The gel manicure can instantly dry, with strong elasticity, and can keep it as long as one month without fading, which is a few weeks longer than the standard nail polish.
Pink manicure is cute and charming, and has a sweet feeling of love. Here we give you a lot of sweet pink gel nails. Let’s have a look together.


Gel Nails in Double Color
If the nails painted is still ordinary, then why do you need it? So what your fingertips want is a dazzling color. The following are the steps of two-color gel nails. Let’s learn about it together:
Step 1: Fix your fingertips and apply transparent nail polish.
Step 2: Use white nail polish as the background color, and apply two layers to make the color more plump.
Step 3: Apply cream on manicure sponge in turn with cream, orange and crimson.
Step 4: wipe the nail polish on the sponge vertically on the thumb, ring finger and little thumb, and completely faint and dye it. Finally, wipe off the redundant nail polish around the fingertip, as shown in the figure.
Step5: In another a sponge on the besmear on the beige, gray and navy blue, in the forefinger and middle finger nail surface wipe, final excess of Polish wipe, complete fingertip of two-color gradient.
Step 6: In order to be more textured and more suitable for autumn, finally it was done with a layer of frosted top oil.


Steps of Decorated Gel Nails
1. Paint the left half of the armor with blue without lighting;
2. Yellow on the right half, also do not light;3. Use a clean pen to draw Z-shape at the junction of the two colors;
4. Wash the pen and draw the Z word again. If you think it uneven, you can focus on the slight dizziness and lighting;
5. Paint the left side of the armor with blue;
6. Use a clean pen to faint naturally from left to right and light;
7. Continue to paint yellow on the right side without lighting;
8. Use a clean pen to faint naturally from right to left and light;
The rear light, the upper sealing layer is completed.


Tutorials of Gel Nails
Step 1: Fix the foundation a, brush the primer and solidify the lamp.
Step 2: Use a small round-head pen dipped in brown nail glue to brush the gradient feeling from the outer edge of the nail surface to the backward edge. Then dip it in dark brown nail glue according to the above method, brush the gradient on the other side of the nail surface, and then solidify it according to the light.
Step 3: In order to make the color more full, we need to brush it again according to the above method, and then the light is solidified.
Step 4: Dip a small round-head pen in the gold foil gel and brush it on the surface of the armor. Be careful that it should also be gradient, and the light should be solidified.
Step 5: Start to paste the ornaments, brush the ornament glue, and then stick the round rivets to solidify the light.
Step 6: Brush the sealing layer and solidify the light. Our two-color gradient armor is finished ~~


Methods of Making Shining Gel Nails
Step 1: brush the primer first, then the light solidifies, brush the white rubber on the sponge, and then pat from the outer edge until 3/4 of the nail surface, after the light solidifies, Pat another layer, still start patting from the outer edge, until the back edge, the light solidifies.
Step 2: In the same way, pat on the pink glue, after the light solidifies, be afraid to hit the second time, strengthen the gradient effect, the light solidifies.
Step 3: brush a layer of transparent gel, solidify the light, paste the back glue Adhesive paper, brush a little jewelry glue, embellish the rhinestone ornaments, solidify the light, finally brush the seal layer, and then solidify the light.


Tips of Making Gel Nails
Tips 1: pay attention to the intensity and frequency of patting. Start patting up from the outer edge. The higher the color is, the lighter the intensity is and the fewer the frequency is. In this way, the gradient effect will be more natural.
Tips 2: because after patting, the nail surface will have the feeling of particles, which is mottled, and it is not conducive to the Adhesive paper of accessories. If you brush the transparent gel, it will become smooth and smooth. However, note that if there is floating gel, the floating glue should be wiped in advance, otherwise it will affect the viscosity of the Adhesive paper.


Steps of Pure Color Gel Nails– the First Part
Step 1: Polish the nails smoothly. If the nails are uneven, it will be uneven after applying nail polish.Before applying nail polish, first apply a layer of primer oil, which can not only make the surface of fingernails more smooth, but also isolate the color nail polish to protect fingernails.
Step 2: color nail polish will be applied next. Color nail polish should choose nail polish with good ductility, and scrape the brush handle and brush hair before use to make one side of the brush clean, and on the other side, there is a small amount of nail polish dripping without dripping.


Steps of Pure Color Gel Nails– the Second Part
Step 3: first apply a little nail polish on the tip edge of the nail, which can make the nail polish more durable, because the nail polish usually starts to fall off from the fingertip.
Step 4: brush the nail polish from the middle of the nail. In order to prevent the second half of the nail polish from becoming less and the color is uneven when brushing the nail polish, you can first apply a stroke on the front part of the nail, then, from the middle bottom, about 2mm away from the upper edge of the nail, write to the fingertip direction. Pay attention to the uniform speed when brushing, and the force should be even to avoid uneven color. And it should be done in one breath. It is better to put your wrist on the table when you brush it to avoid shaking hands.


Steps of Pure Color Gel Nails– the Last Part
Apply both sides after brushing in the middle, and also start from the bottom 2mm away from the edge of the nail. Write gently, and gradually apply force to separate the brush head during the painting process, making the coverage area larger.
In this way, overlapping stripes can be avoided. The color nail polish can be painted with two layers in the same way, and the first layer should be thinner. The second layer should be thicker. Pay attention to wait until the first layer is dry and then apply the second layer.


Gel Nails Decorated with Rhinestones
Step 1: Clean your fingernails first, and polish the fine lines on your fingernails with polishing strips.
Step 2: apply a layer of nutritional base oil to moisturize the nails.
Step 3: apply your favorite nail polish and wait until it dries.
Step 4: glue the small rhinestone on the nail position according to your favorite flower shape.
Step 5: apply a layer of transparent nail polish on the rhinestone after the glue is dry. (apply it twice if necessary .)
Dry it thoroughly.